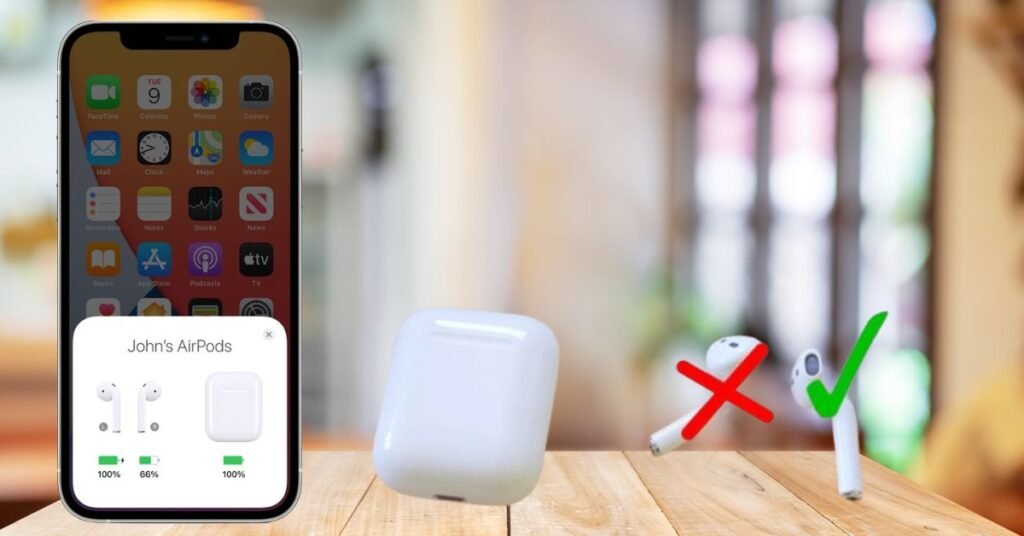
Why won’t my left AirPod connect? This is a common frustration for many AirPod users. You have company if you’re dealing with this problem. Many AirPod customers have faced the problem of one earbud not working. It offers practical strategies to fix your AirPods. Our detailed guide will help you diagnose and repair a stubborn left or right AirPod that will not connect.
By the conclusion of this post, you will know how to fix your AirPods and have continuous audio again. We will cover everything you need to know to troubleshoot your AirPods, from battery checks to software upgrades.
Understanding AirPod Connection Issues
Understanding why AirPod connectivity difficulties arise is crucial before finding solutions. AirPods are complicated gadgets that use many technologies. Several causes may cause an AirPod, especially the left one, to disconnect:
- Battery related issues
- Bluetooth connectivity problems
- Software glitches or outdated firmware
- Physical obstructions or damage
- Incorrect device settings
- Hardware malfunctions
We can troubleshoot better by knowing these reasons. Let us examine each aspect and provide remedies.
Check Your AirPods Battery Levels
A low battery is a typical reason your left AirPod will not connect. One AirPod may run out of power before the other because it drains at different rates. Check AirPods battery levels:
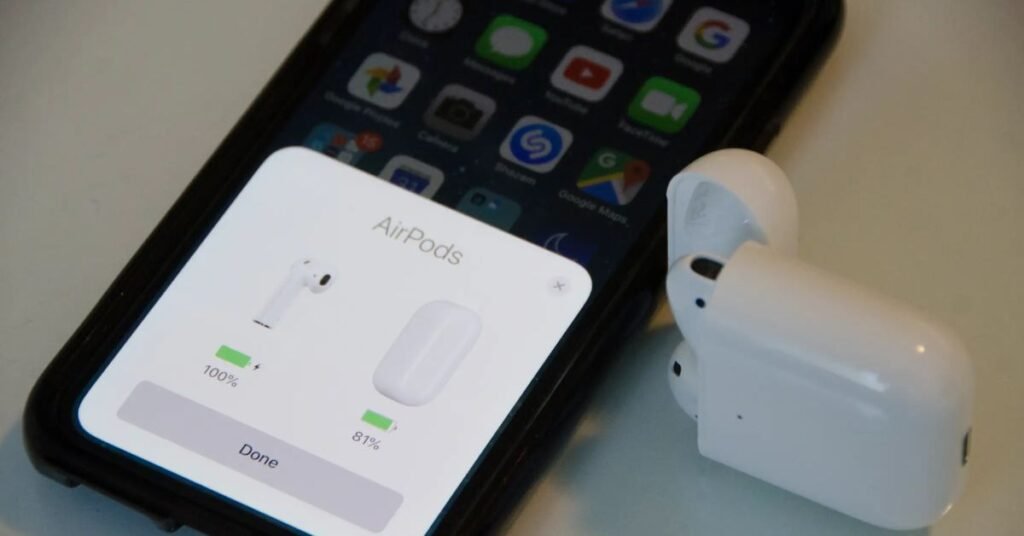
- Place both AirPods in the charging case.
- Place your iPad or iPhone next to the open case lid.
- Wait a few moments for the battery status to appear on your device’s screen.
If the left AirPods battery is severely low, charge both for 30 minutes before using them. Older AirPods may have lower battery capacity, causing more disconnections.
To maintain optimal battery health:
- Avoid exposing your AirPods to extreme temperatures
- Keep the airpods in their case when not using
- Keep the charging case charged to ensure your AirPods are always ready to use
Your left AirPod draining quicker than the right may signal a battery problem that needs expert treatment.
Restart Your Device and Toggle the Bluetooth
Restarting your device and switching Bluetooth may fix connectivity troubles. This resets the Bluetooth stack and fixes temporary issues. Follow these steps:
- Turn off your iPhone or iPad.
- After some time has passed, turn it back on.
- Go to Settings, then Bluetooth.
- Toggle the Bluetooth switch off and wait for 5 to 10 seconds.
- Toggle Bluetooth back on.
- Try reconnecting your AirPods.
If this does not work, forget and reconnect the AirPods from your Bluetooth devices list:
- Go to Settings, then Bluetooth.
- Select your AirPods by tapping the little i symbol that appears beside them.
- Select Forget This Device.
- Return AirPods to case and seal lid.
- Open the case lid and hold the setup button on the rear until the status light flashes white.
- Reconnect your AirPods to your device.
This may reset the Bluetooth connection and repair your left AirPod not connecting.
Reset Your AirPods
Reset your AirPods to factory settings if restarting and switching Bluetooth does not work. This typically fixes persistent connectivity issues:
- Put both AirPods in the charging case and seal it.
- After 30 seconds, open the lid.
- Settings then Bluetooth on iPhone or iPad.
- Tap the i next to your AirPods.
- Click Forget This Device and confirm.
- Open the AirPods case lid and press and hold the setup button on the rear for 15 seconds until the status light flashes amber, then white.
- Reconnect AirPods to the device.
AirPods reset to factory settings typically fix connectivity difficulties. After resetting, you must adjust custom settings like double tap or automatic ear recognition.
Clean Your AirPods
Physical obstacles might prohibit your left AirPod from connecting. Dust, earwax, and debris may obscure sensors and speakers, causing connection troubles. How to safely clean AirPods:
- Wipe the outside with a gentle, dry, lint free cloth.
- Dampen the cloth slightly (avoid putting water in holes) for tough dirt.
- Dry cotton swabs, clean microphone, and speaker meshes.
- Attention to the AirPods sensors is essential for successful operation.
- AirPods should be dry before being returned to the charging case.
- Cleaning regularly prevents connection difficulties and boosts performance.
Check Audio Settings
Some AirPods cease operating due to incorrect audio settings. This is especially true if you have altered accessibility settings. How to verify and modify settings:
- Open iOS Settings, then Accessibility, and then Audio or Visual.
- Under Hearing, find the Balance slider.
- Center the slider for left right audio balance.
The slider being off center might explain why does not my left AirPod connect or play audio. While in settings, check:
- Mono Audio: Turn it off until needed.
- Headphone Accommodations: Turning this off may fix the problem.
Try the left AirPod after each adjustment to make sure it connects.
Update Your Device and AirPods Firmware
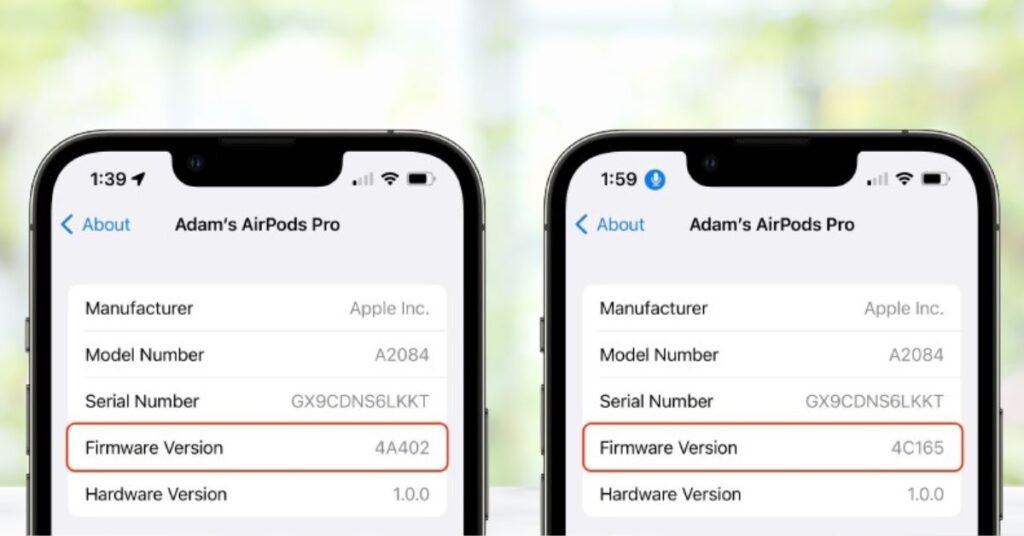
Outdated software might disrupt connection. AirPods and device must have the newest software:
For your iPhone or iPad:
- Settings then General, then Software Update
- Install updates if available.
For your AirPods:
- AirPods update automatically with iOS.
- Make sure your AirPods are in their case, charging, and near your iOS device.
- Connect iOS to Wi Fi to update.
Updating your devices prevents various difficulties, including connectivity troubles. Apple constantly changes AirPods firmware to enhance connection and performance.
Check for Interference
Bluetooth devices may be interfered with by other devices or obstacles. If your left AirPod won’t connect, try:
- Avoid Bluetooth and Wi Fi gadgets.
- Remove any metal between your AirPods and smartphone.
- If there are several wireless devices in a crowded area, move.
Your left AirPod may malfunction while the right one works due to interference.
Disable Automatic Ear Detection
Automatic ear detection is helpful but might create connectivity troubles. Turn off this feature to see if it fixes it:
- Open iOS Settings, then Bluetooth.
- Tap the i next to your AirPods.
- Turn off Automatic Ear Detection.
Check your AirPods left connection. Whether this fixes the problem, you may turn off this feature or re-enable it to see if it happens again. Know how to turn off AirPod max as well.
Check for Physical Damage
Physical injury may disrupt connections. Check your AirPods and charging case for damage:
- Check AirPods and case for cracks or dents.
- Inspect the case’s charging contacts for damage.
- Check the charging case lid’s closure.
Physical damage may be preventing your left AirPod from connecting. If so, contact Apple Support for repair or replacement.
Try Connecting to Another Device
Try connecting your AirPods to another iOS or Android device to see if the problem is with them:
- Press the rear case button to link your AirPods.
- Select AirPods in Bluetooth settings on the new device.
If your left AirPod connects to another device, your original device’s settings or Bluetooth stack may be the issue. You may need to reset your original device’s network settings:
- Go to Settings, then General Reset.
- Hit Reset Network Settings.
- Enter your passcode if asked.
- Confirm reset.
Following this reset, be prepared to re enter all network settings, including stored Wi Fi passwords.
Check for Hardware Issues
Left AirPod hardware issues may occur if none of the following options work. Visit an Apple Store or call Apple Support for professional assistance. They can diagnose and repair or replace AirPods.
Provide these while calling Apple Support:
- AirPods serial number (on charging case)
- Detailed explanation of the problem
- What troubleshooting steps you have already tried
AirPods under warranty may be repaired or replaced by Apple.
Conclusion
We have tried several methods for a left AirPod that will not connect. These troubleshooting procedures should address most connection difficulties, from checking the battery and cleaning your AirPods to resetting and upgrading software. Why Won’t My Left AirPod Connect? After attempting these methods, contact Apple Support. With careful care, maintenance, and occasional troubleshooting, your AirPods should deliver years of smooth, high quality music. Use these steps to enjoy music, podcasts, and calls with both AirPods operating together again.
People Also Ask!
It can be because of a dead battery, interference from Bluetooth, out of date firmware, or even physical obstacles. If your AirPods are not working, try charging them, restarting the Bluetooth connection, installing software updates, or cleaning them.
Yes, the AirPods sensors may become clogged with dirt and debris, leading to connection problems. Regular cleaning may prevent this issue and ensure optimum performance.
This can be because the left AirPod is malfunctioning, the battery is not draining evenly, or the audio balance settings are off. Reset your AirPods, check the battery life, and adjust the audio settings if necessary.
When you connect your AirPods to your iOS device, they will update immediately. To upgrade your AirPods, ensure your iOS device is current and connected to WiFi. Updates are optional regularly, but it is wise to check in every so often.
Please contact Apple Support or visit an Apple Store for expert assistance if you have already attempted all of these alternatives and your left AirPod is still needs to be connected. They can conduct diagnostic testing and provide further assistance or replacement if required.

